20+ Procreate Freckle Brush Set: Add Character to Your Art
In the world of digital illustration, subtle details often make the biggest impact. The way light catches a cheekbone, the texture of skin under different lighting, or the scatter of freckles across a nose can transform a flat digital image into a piece with depth and personality. For artists using Procreate, achieving this level of realism or stylized detail requires the right tools. This is where a specialized asset like the 20+ Procreate Freckle Brush Set becomes invaluable. It's not just another collection of dots; it's a dedicated toolkit designed to solve a specific challenge: painting convincing, beautiful freckles and skin texture with speed and artistic control.
More Than Dots: The Art of Realistic Skin Texture
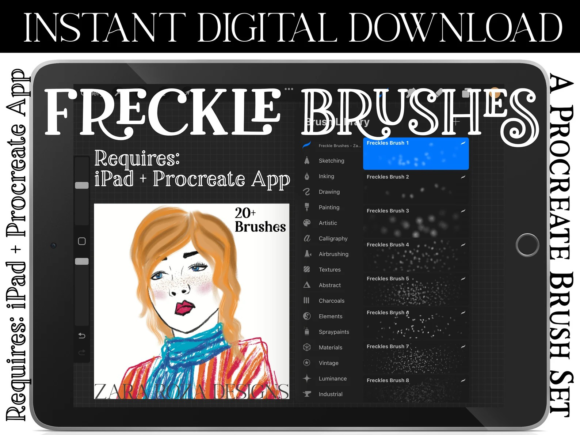
At its core, this brush set is a problem-solver. Manually painting hundreds of freckles with a standard round brush is tedious and often results in unnatural, uniform patterns. The 20+ Procreate Freckle Brush Set provides a variety of brush engines that mimic the organic, scattered, and clustered nature of real freckles. You'll find brushes that create soft, diffused clusters perfect for a sun-kissed look, alongside others that lay down crisp, defined dots ideal for a graphic or cartoon style. The visual appeal lies in this versatility. Whether you're aiming for the hyper-realism of a portrait or the charming simplicity of a character illustration, these brushes provide the foundational texture to build upon.
The true strength of this collection is its personality. It empowers the artist to experiment. A character designer can use the stippling brushes to add a layer of youthful charm, while a digital painter can use the more nuanced freckle pens to enhance the realism of a portrait study. The brushes are also multifunctional, serving double duty for dot painting, creating stippled shading effects, or even adding texture to backgrounds and clothing. This makes them a valuable part of any illustrator's broader design assets library, extending their utility far beyond just facial features.
Integrating Texture into Your Creative Workflow
Knowing you have a powerful tool is one thing; knowing how to use it effectively is another. Integrating the 20+ Procreate Freckle Brush Set into your workflow is straightforward, but a few strategic considerations can maximize its impact. For character design and illustration, these brushes are essential for creating distinct looks. A light scatter of freckles can suggest a playful, outdoorsy personality, while a more pronounced pattern can become a defining feature of a character's identity, much like a signature hairstyle or accessory.
In the realm of brand identity, texture and personality are crucial. If you're crafting a brand for a product that evokes natural beauty, authenticity, or a handmade feel—think cosmetics, artisanal goods, or a lifestyle blog—incorporating hand-drawn textures is a powerful strategy. Using these freckle brushes to add subtle, organic elements to social media graphics, website banners, or packaging mockups can inject a human touch that sterile digital graphics often lack. It helps build a brand perception that is approachable, detailed, and crafted with care.
For editorial design and web design, texture can guide the eye and create visual interest. Imagine using a stipple brush from this set to create a unique background pattern for a magazine spread or a subtle textured overlay on a hero image for a website. This technique adds depth without overwhelming the core message, enhancing the overall visual hierarchy. The key is to use it with intention. Apply the texture on a separate layer in Procreate, allowing you to adjust opacity, blend modes, and placement non-destructively. This gives you the flexibility to ensure the texture supports your composition rather than competing with it.
Choosing and Using Your Digital Brush Toolkit
When selecting any creative font or digital asset, the first step is always to evaluate its fit for your project. The 20+ Procreate Freckle Brush Set is designed for a very specific purpose. If your work involves portraiture, character art, or any illustration where skin texture is relevant, it's a direct solution. For projects focused solely on clean typography or geometric shapes, it may not be the primary tool, but it could still offer interesting experimental possibilities.
Practical guidance is simple: download the .brushset file, import it into Procreate, and the entire collection will appear in your brush library. Test each brush on a separate canvas to understand its behavior. Some brushes will respond to pressure sensitivity, allowing you to vary the size and opacity of the freckles with a light or heavy touch—a critical feature for achieving a natural look. Pay attention to the spacing and scatter settings within the brush studio; understanding these will help you customize the brushes further to suit your personal style.
Remember that this tool is about enhancing your artistic voice, not replacing it. Use it to speed up your workflow and add a layer of detail that would be time-consuming to create manually. Combine it with other brushes in your collection—perhaps a handwritten font for text overlays or a textured ink brush for outlines—to create a cohesive, multi-layered piece. The goal is to build a versatile toolkit where each asset, from a premium typeface to a specialized Procreate brush set, serves a clear purpose in bringing your creative vision to life. Happy drawing! :)